HOW TO MAKE A BLEACH TIE-DYE TEE
Make your own sun-kissed, summer look with DIY tie-dye. Bleach-dying is probably the easiest way to try out this major trend since you can use what you already have around the house.
Ready to get started?

Step One: Gather Your Materials
Prep for your tie-dye sesh by rounding up a few necessities. And keep in mind, when working with bleach, you should ALWAYS work in a well-ventilated area. We recommend outside! A t-shirt in any color except white (check out our women’s shirts & men’s t-shirts here!)
• Rubber bands or hair ties
• A spray bottle
• Gloves
• Bleach
Once you’ve got everything you need, set up your work station by putting cardboard or a plastic bag on a flat surface for minimal clean up.
Step Two: Twist Your Shirt
From there, lay down your t-shirt and begin twisting from the middle, then use rubber bands to hold your one-of-a-kind design in place.
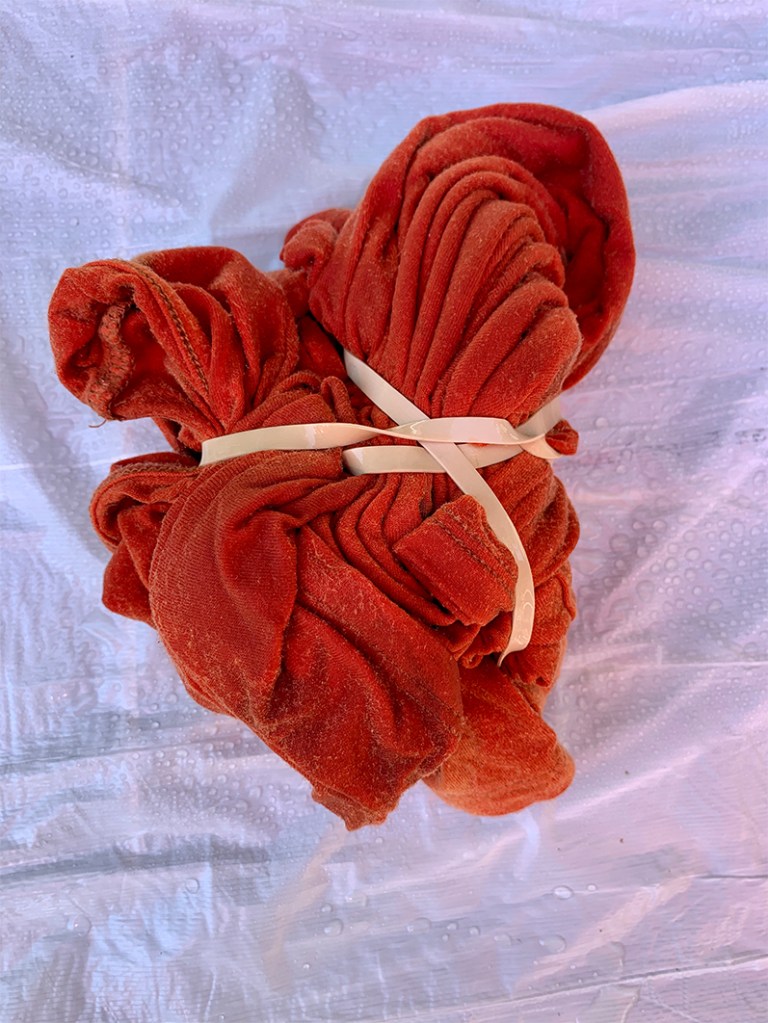
Step Three: Spray with Bleach
Now’s time for the gloves – put them on and combine one part bleach with one part water. Then spray your shirt a BUNCH. Go lighter for a more low-key look and heavier for a more noticeable dye.
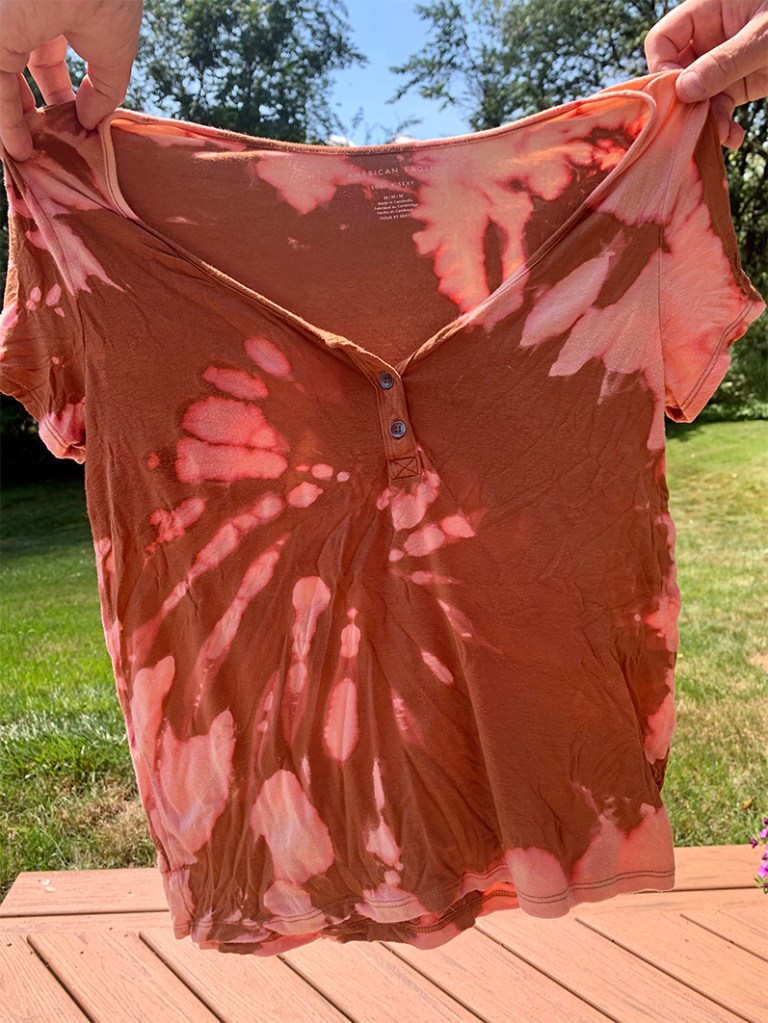
Step Four: Unwrap & Let Dry
Keep on the gloves and unwrap your shirt to check out your masterpiece! Let it dry completely, then wash once by itself before you wear it.
Show us your take on tie dye by tagging us on Instagram & Twitter with #AEJeans @americaneagle and you could be featured on our site, social media, or blog!